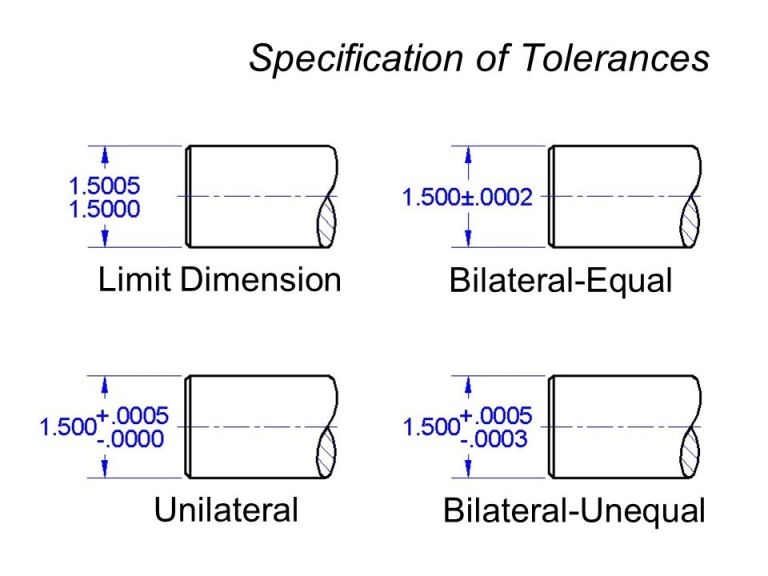
Unilateral Tolerance - A unilateral tolerance is a tolerance in which variation is permitted only in one direction from the specified dimension, example, 1.500 +. 005/ -. 000."
Hence when tolerance is given on one side of the basic dimension, it is called Unilateral tolerance.
1) When tolerance is given on one side of the basic dimension, it is called
Unilateral tolerance

Related Limits and Fits MCQ - Turner (Set-1) with Answers
Max. 50.025 mm ; Min. 50.002 mm
Upper Limit = Basic Size +ES = 50+0.025=50.025
Lower Limit = Basic Size + EI = 50+0.002 = 50.002
21 classes of fits and 16 grades of tolerances
British standard limit system consists of 21 classes of fits and 16 grades of tolerances.
25.00 mm
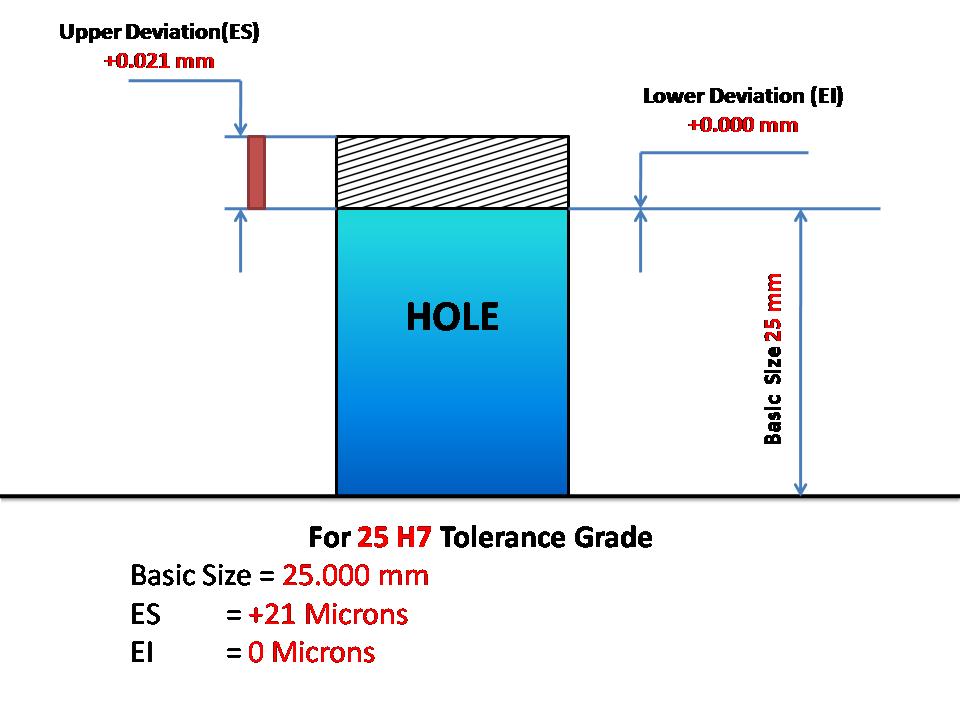
A dimension is stated as Dia 25 H7 in a drawing. The lower limit is 25.00 mm.
For 25 H7 Tolerance Grade
Basic Size = 25.000 mm
ES = +21 Microns = 0.021 mm
EI = 0 Microns = 0.000 mm
Hence
Lower limit = Basic Size + EI = 25.000 + 0.000 = 25.000 mm
Upper Limit = Basic Size + ES = 25.000 + 0.021 = 25.021 mm
Hence A dimension is stated as Dia 25 H7 in a drawing. The lower limit is 25.000 mm.

0.04 mm
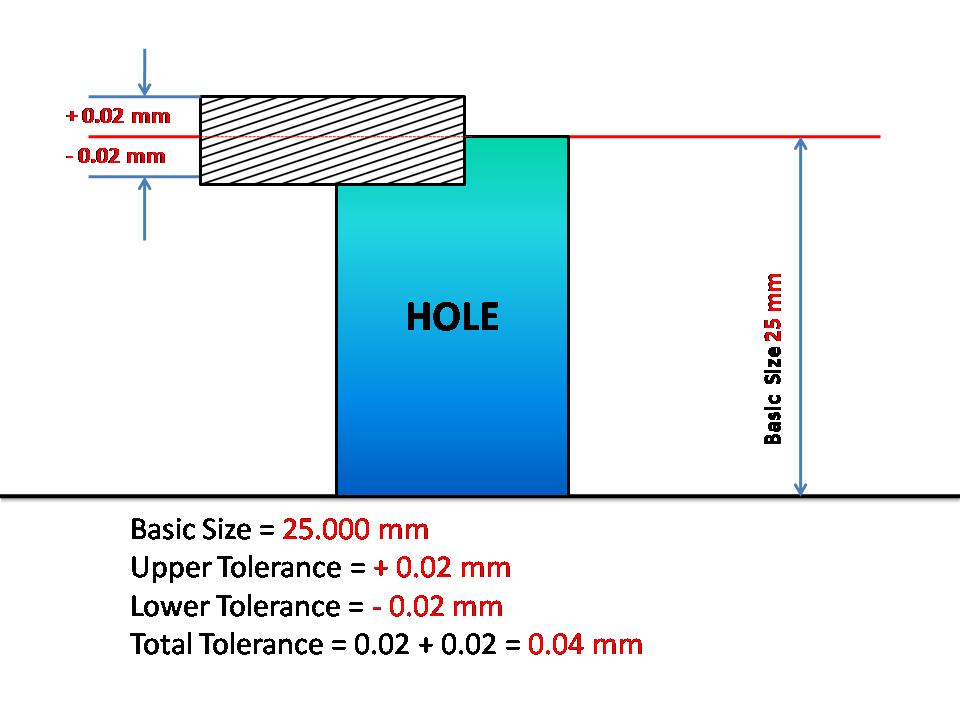
A dimension is stated as 25 +/-0.02 mm in a drawing. Then
Basic Size = 25.000 mm
Upper Tolerance = + 0.02 mm
Lower Tolerance = - 0.02 mm
Total Tolerance = 0.02 + 0.02 = 0.04 mm
