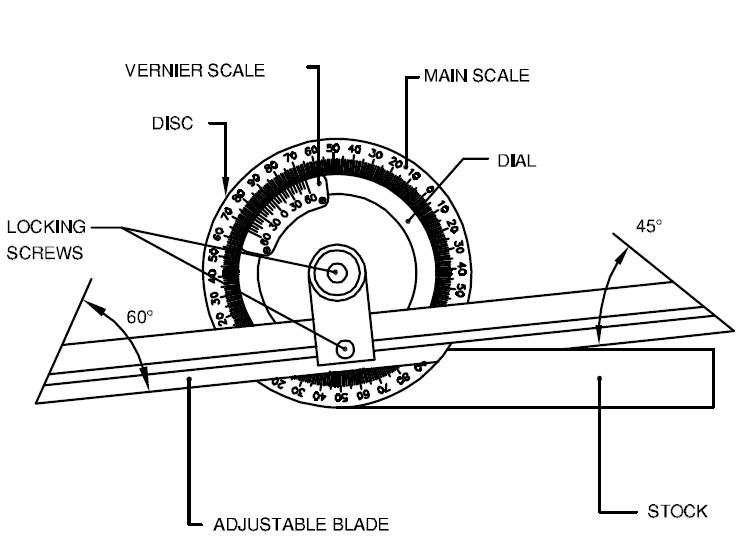
The vernier bevel protractor is a precision instrument meant for measuring angles to an accuracy of 5 minutes.
The Least count of vernier bevel protractor is 5' (Five Minutes)
The value of each Vernier scale division of Vernier bevel protractor is 1 degree 55 minutes.
To get the least count of 5 minutes (5') in a vernier bevel protractor the 23 degree main scale is divided into 12 equal parts on vernier scale.
Following are the parts of a vernier bevel protractor.
Stock : – This is one of the contacting surfaces during the measurement of an angle. Preferably it should be kept in contact with the datum surface from which the angle is measured.
Dial:– The dial is an integrated part of the stock. It is circular in shape, and the edge is graduated in degrees.
Blade:- This is the other surface of the instrument that contacts the work during measurement. It is fixed to the dial with the help of the clamping lever. A parallel groove is provided in the centre of the blade to enable it to be longitudinally positioned whenever necessary.
Locking Screws:- Two knurled locking screws are provided, one to lock the dial to the disc, and the other to lock the blade to the dial.
20) In vernier bevel protractor, the value of each divisions of the vernier scale is
Answer is:
1 degree 55 minutes
Explanation:

Related KPSC ITI JTO Turner Question Papers - 2018 with Answer Key
Answer is:
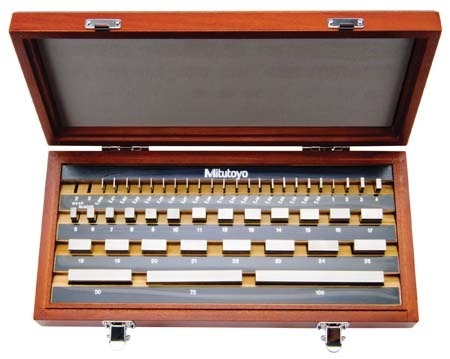
Set of 112 pieces

Answer is:
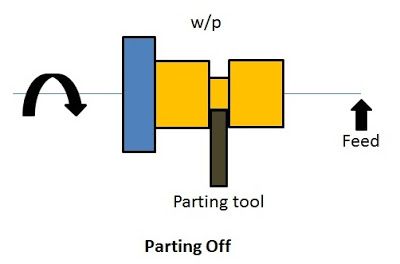
Parting off

Answer is:
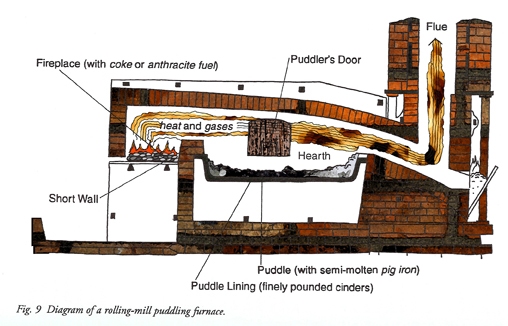
Puddling furnace
Explanation:
Wrought Iron is the purest form of iron; although it may contain traces of carbon. It is usually made by ‘‘puddling process’’. It is very costly and its use has been almost totally replaced by cheaper steel. However, for some components like chain-links and Crane-hooks wrought iron is still the preferred raw material.

Answer is:
Grade II
Explanation:
Slip gauges are graded according to their accuracy as Grade 0, Grade I and Grade II.
Grade 0 is used in laboratories and standard room which serves as standard for periodically checking the accuracy of Grade I and Grade II gauges.
Grade I is of higher accuracy and used in inspection departments.
Grade II is intended for use in workshops during the actual production of components, tools and gauges.
